Key Takeaway: A stuck N64 reset button is almost always caused by dried gunk, usually dust, dirt, or old soda residue. You need a 4.5mm Gamebit screwdriver and 91% isopropyl alcohol. The whole fix takes about 10 minutes.
The console I'm working on below wasn't dusty. The culprit was what looked like old soda. My best guess is that something spilled on the reset button and dried out over time, leaving it gunky enough to stop working entirely. Honestly, this is an easy fix. Grab a 4.5mm gamebit opener, and you can have it sorted out pretty quickly.
6 Easy Steps to Fix Your N64 Reset Button
The Table of Contents
Tools needed to perform this repair are:
- 4.5 mm Game Bit Opener
- Q-tip or toothbrush
- Rubbing Alcohol
- 409 cleaner or something similar.
- Paper Towel
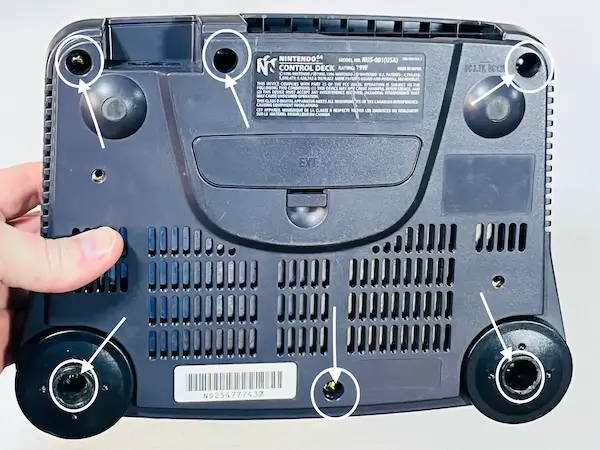
Step 1: Open the console.
- Flip the console over and use a 4.5 mm gamebit screwdriver to remove the six screws from the bottom panel.
- Lift the top shell straight up with caution to reveal the internal components.
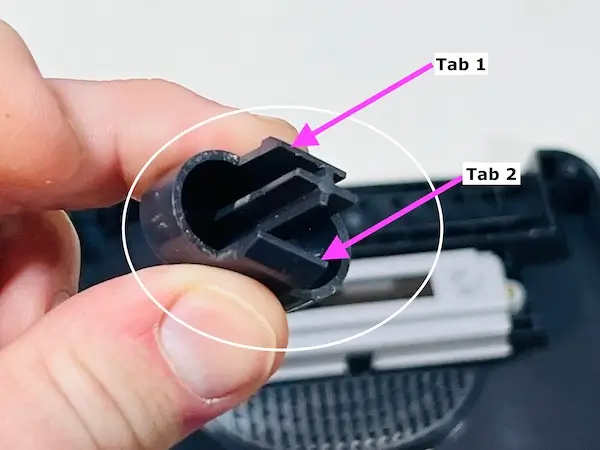
Step 2: Locate and remove the reset button.
- Turn the top shell over to access the underside. Locate the two plastic tabs on either side of the reset button's base.
- Squeeze the tabs inward toward the center. Then, push the button out through the top of the shell.
- If the button is stuck because of grime, use a small amount of 91% isopropyl alcohol around the edges. This will help loosen the residue.
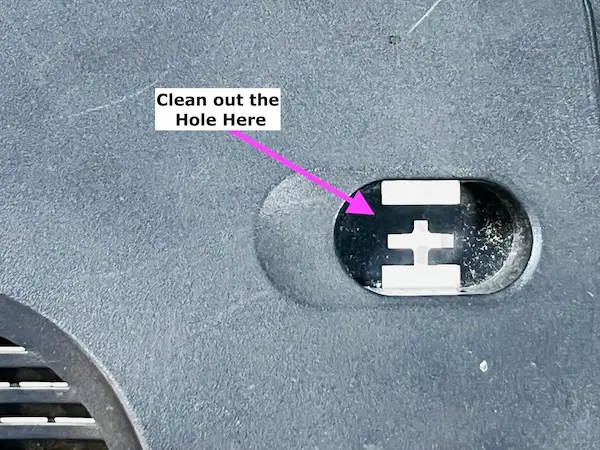
Step 3: Clean
- Use a cotton swab or toothbrush dipped in 91% isopropyl alcohol. Scrub the inside of the button housing to remove grime.
- Clean the edges of the button itself until all residue is gone.
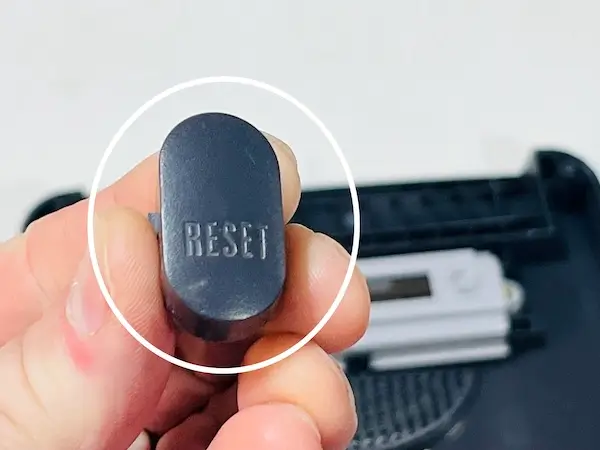
Step 4: Test the reset button.
- Snap the reset button back into its slot on the top shell until the tabs click into place. Press it several times to confirm that it springs back freely and without friction.
- Before final assembly, check the white reset switch on the internal motherboard. If it feels stiff, use a drop of isopropyl alcohol or electronic contact cleaner.
- Then, click it repeatedly to remove any internal oxidation.
- Place the top shell back onto the base, flip the unit over, and reinstall the six 4.5mm screws.
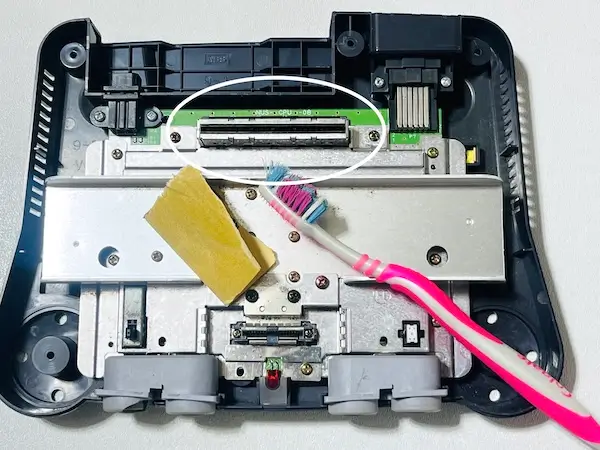
Step 5: Clean the Cartridge Slot
- Clean the cartridge slot before reassembling. For heavy buildup or oxidation, use fine-grit sandpaper with a gentle touch.
- This will help clear the pins, as shown in the video. Be careful not to apply excessive pressure.
- For the last step, dip a toothbrush in 91%+ isopropyl alcohol. Use it to scrub off any leftover dust and debris.
- Conduct a visual inspection to ensure the slot is clear before closing the console.
Step 6: Reassemble
- Place the top shell over the motherboard. Ensure that the power and reset buttons fit securely.
- Secure the unit by reinstalling the six 4.5 mm screws into the bottom panel. Finally, slide the power switch.
- Then, press the reset button. This checks if they move freely and haven't shifted during assembly.
Here is our how-to video covering all 6 steps.
 ▶
▶
Frequently Asked Questions
Why is my N64 reset button stuck?
The most common cause is dried residue — dust, dirt, or old soda that spilled on the button and hardened over time. The gunk builds up around the edges of the button housing and prevents it from springing back after being pressed. Less commonly, the white reset switch on the motherboard has oxidized and needs cleaning too.
What tools do I need to fix a stuck N64 reset button?
A 4.5mm Gamebit screwdriver to open the console, a cotton swab or toothbrush, 91% isopropyl alcohol, and a paper towel. That's it. You don't need soldering equipment or replacement parts for a standard sticky button fix.
What cleaner should I use on an N64 reset button?
91% isopropyl alcohol. Use it on a cotton swab or toothbrush to scrub the inside of the button housing and the edges of the button itself. The high alcohol concentration evaporates quickly and won't damage the plastic or internal components. Avoid water, WD-40, or anything oil-based.
How do I remove the reset button from an N64?
After opening the console, turn the top shell over and locate the two plastic tabs on either side of the reset button base. Squeeze the tabs inward toward the center and push the button out through the top of the shell. If it's stuck from grime, apply a small amount of 91% isopropyl alcohol around the edges first to loosen the residue before pushing it out.
How do I open a Nintendo 64 console?
Flip the console upside down and use a 4.5mm Gamebit screwdriver to remove the six screws from the bottom panel. Lift the top shell straight up carefully to reveal the internal components. A standard Phillips screwdriver will not work — Nintendo used proprietary Gamebit security screws on the N64.